I scream, You scream, We all Scream for ICE CREAM!
After making my felt board I decided to make some fun, eye catching felts too! And what toddler doesn’t love ice cream? Why not make your own by choosing favorite flavors, toppings and more? Since I didn’t have a pattern and wanted to get extra creative, I did this all from scratch.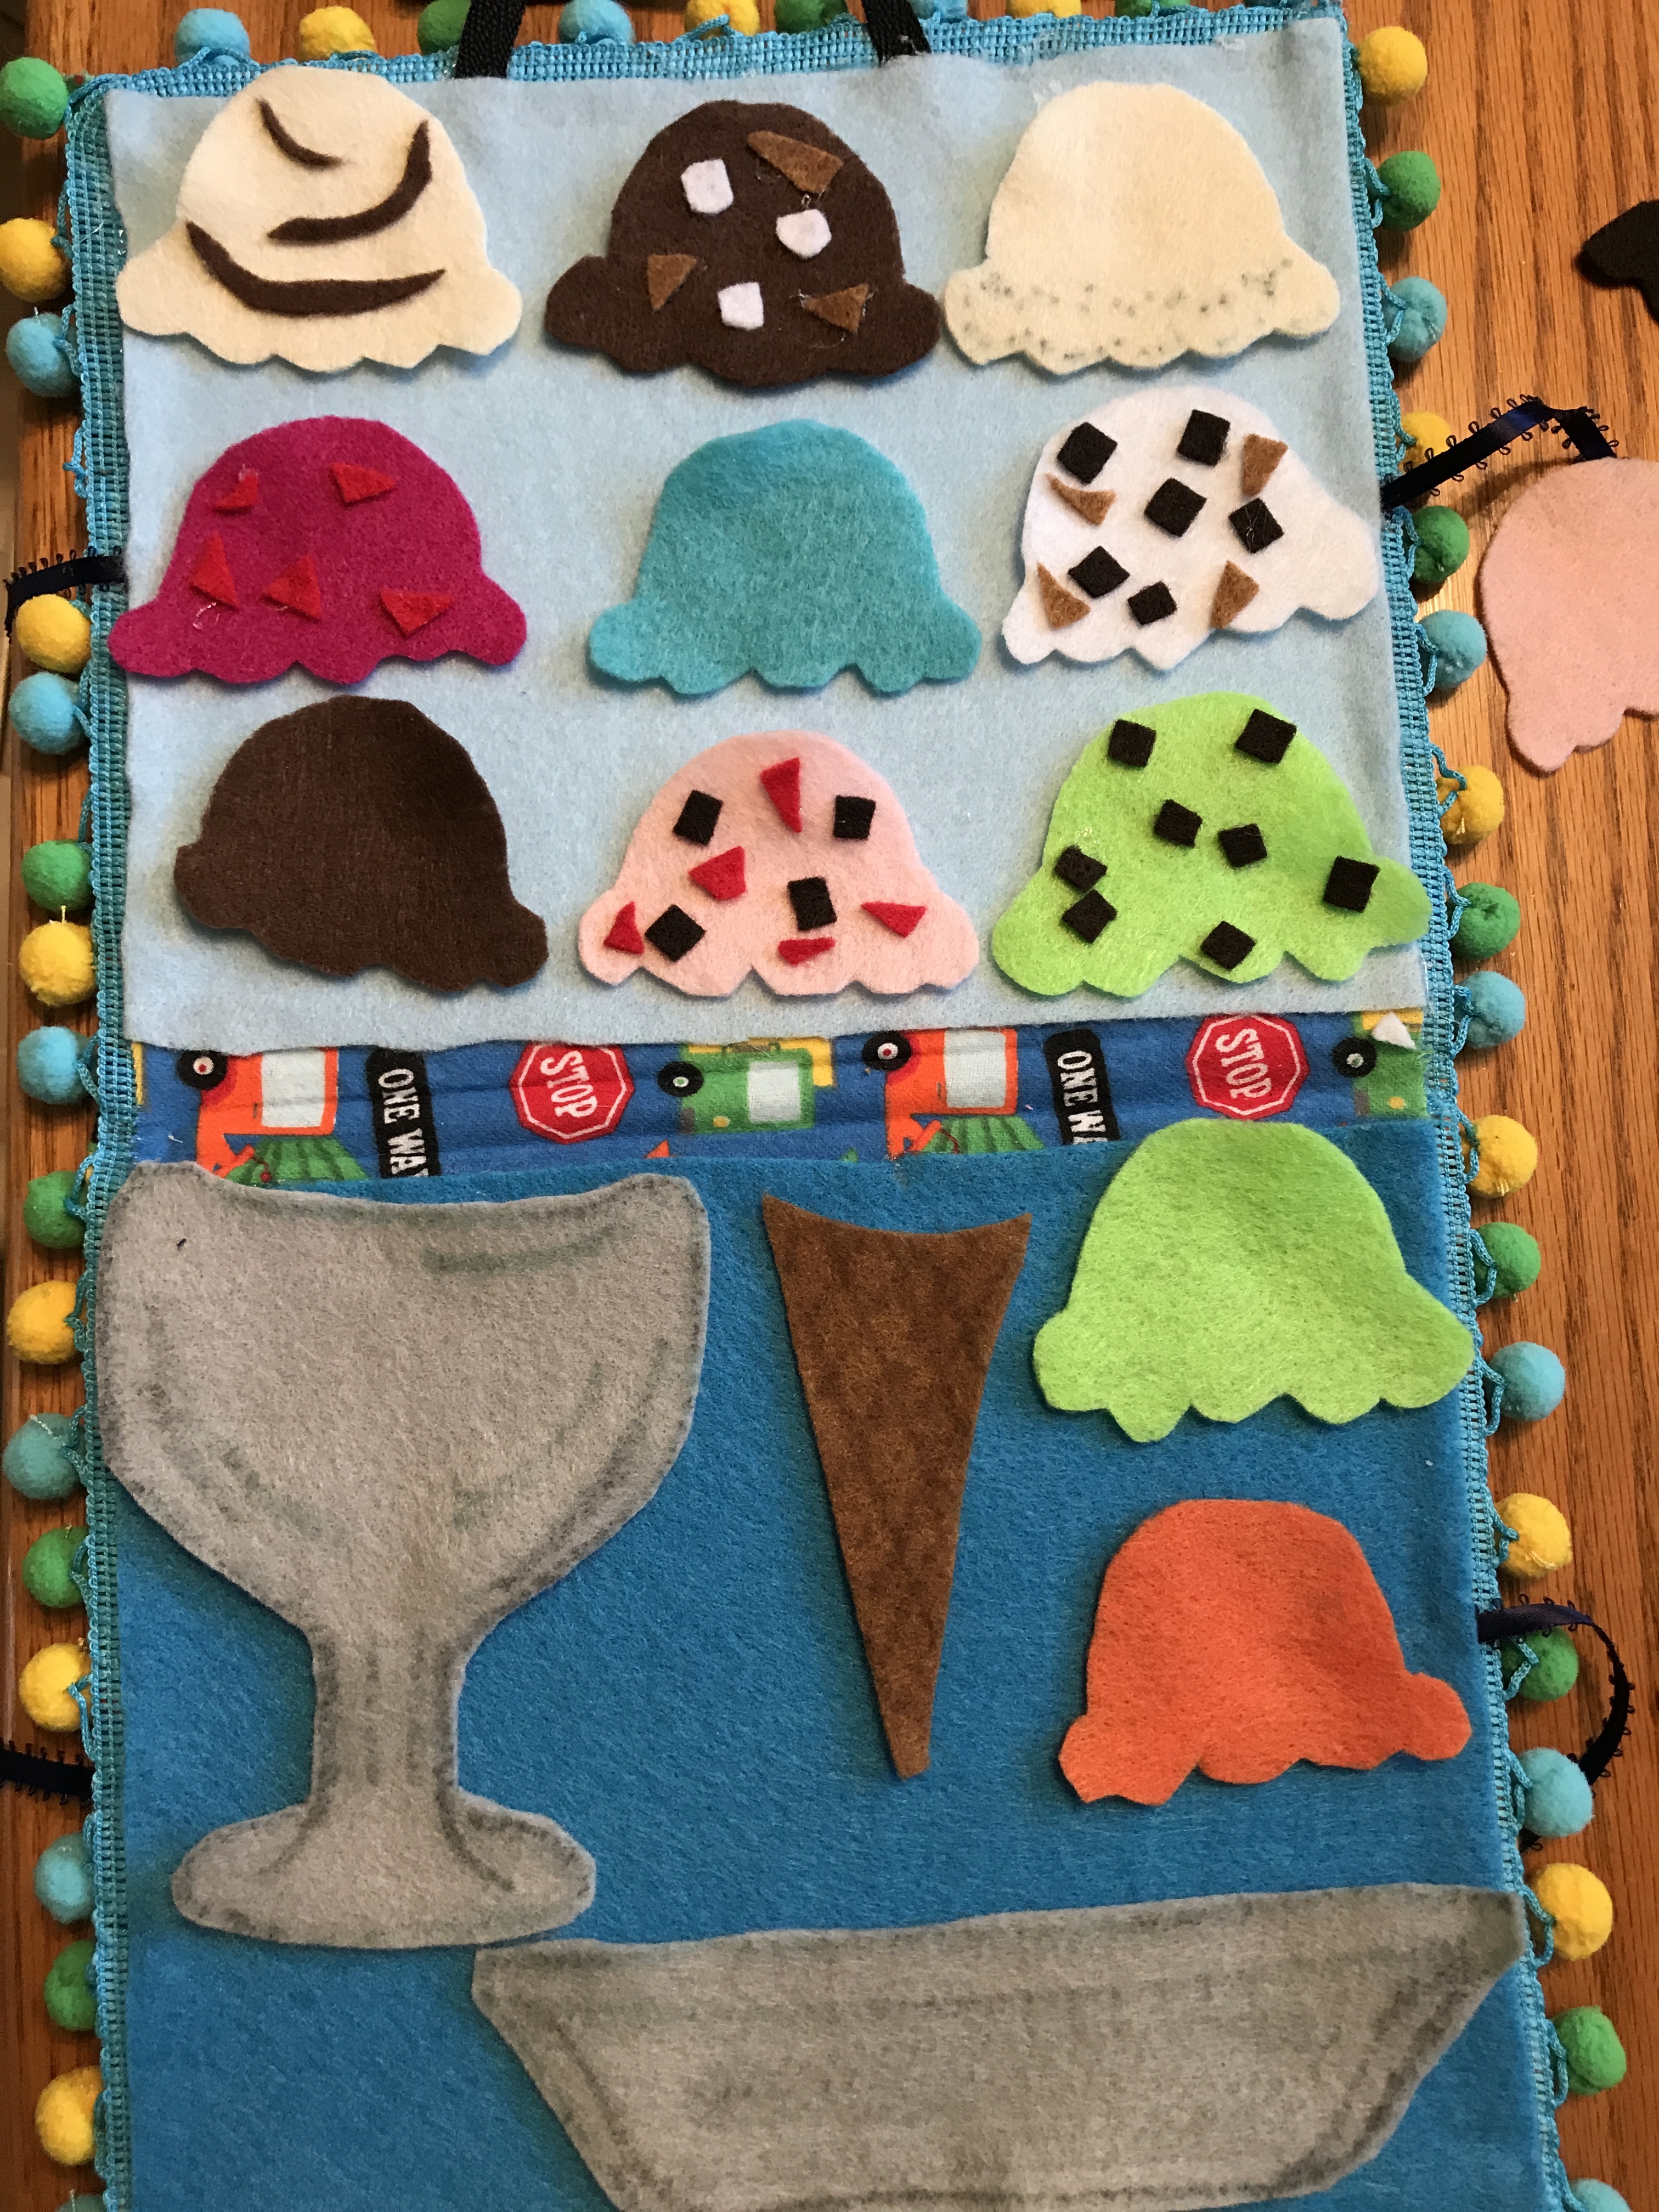
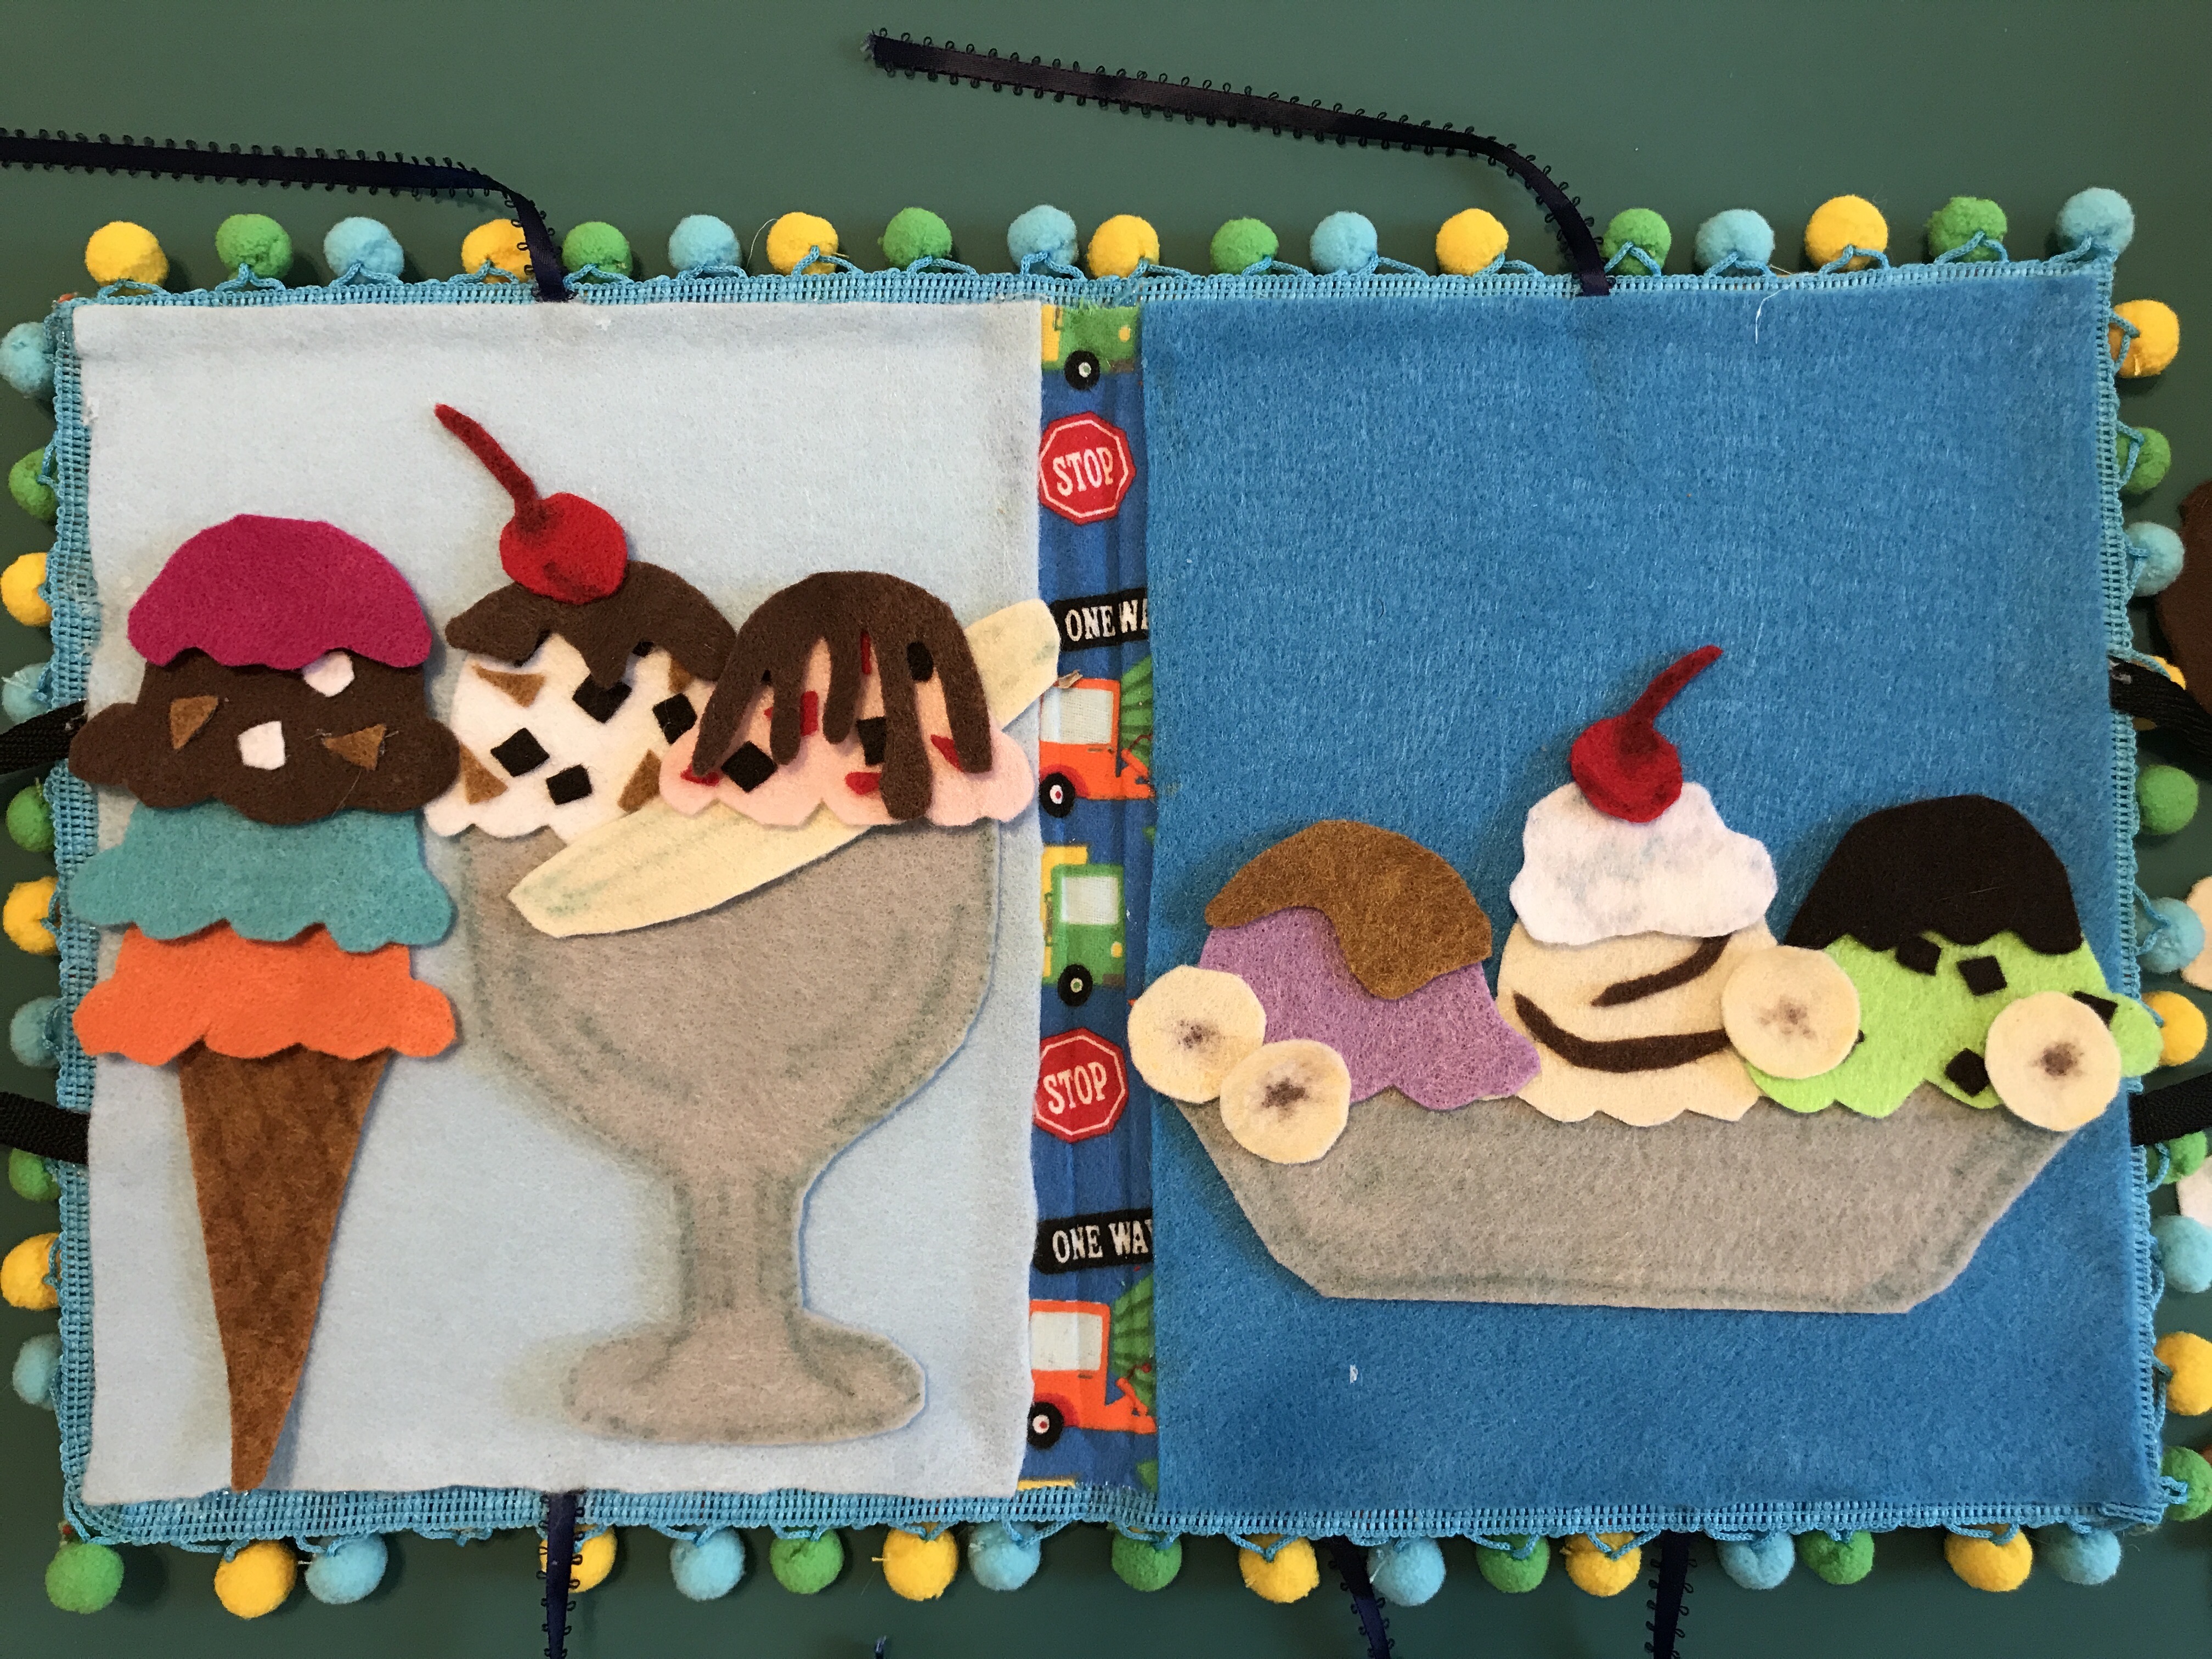
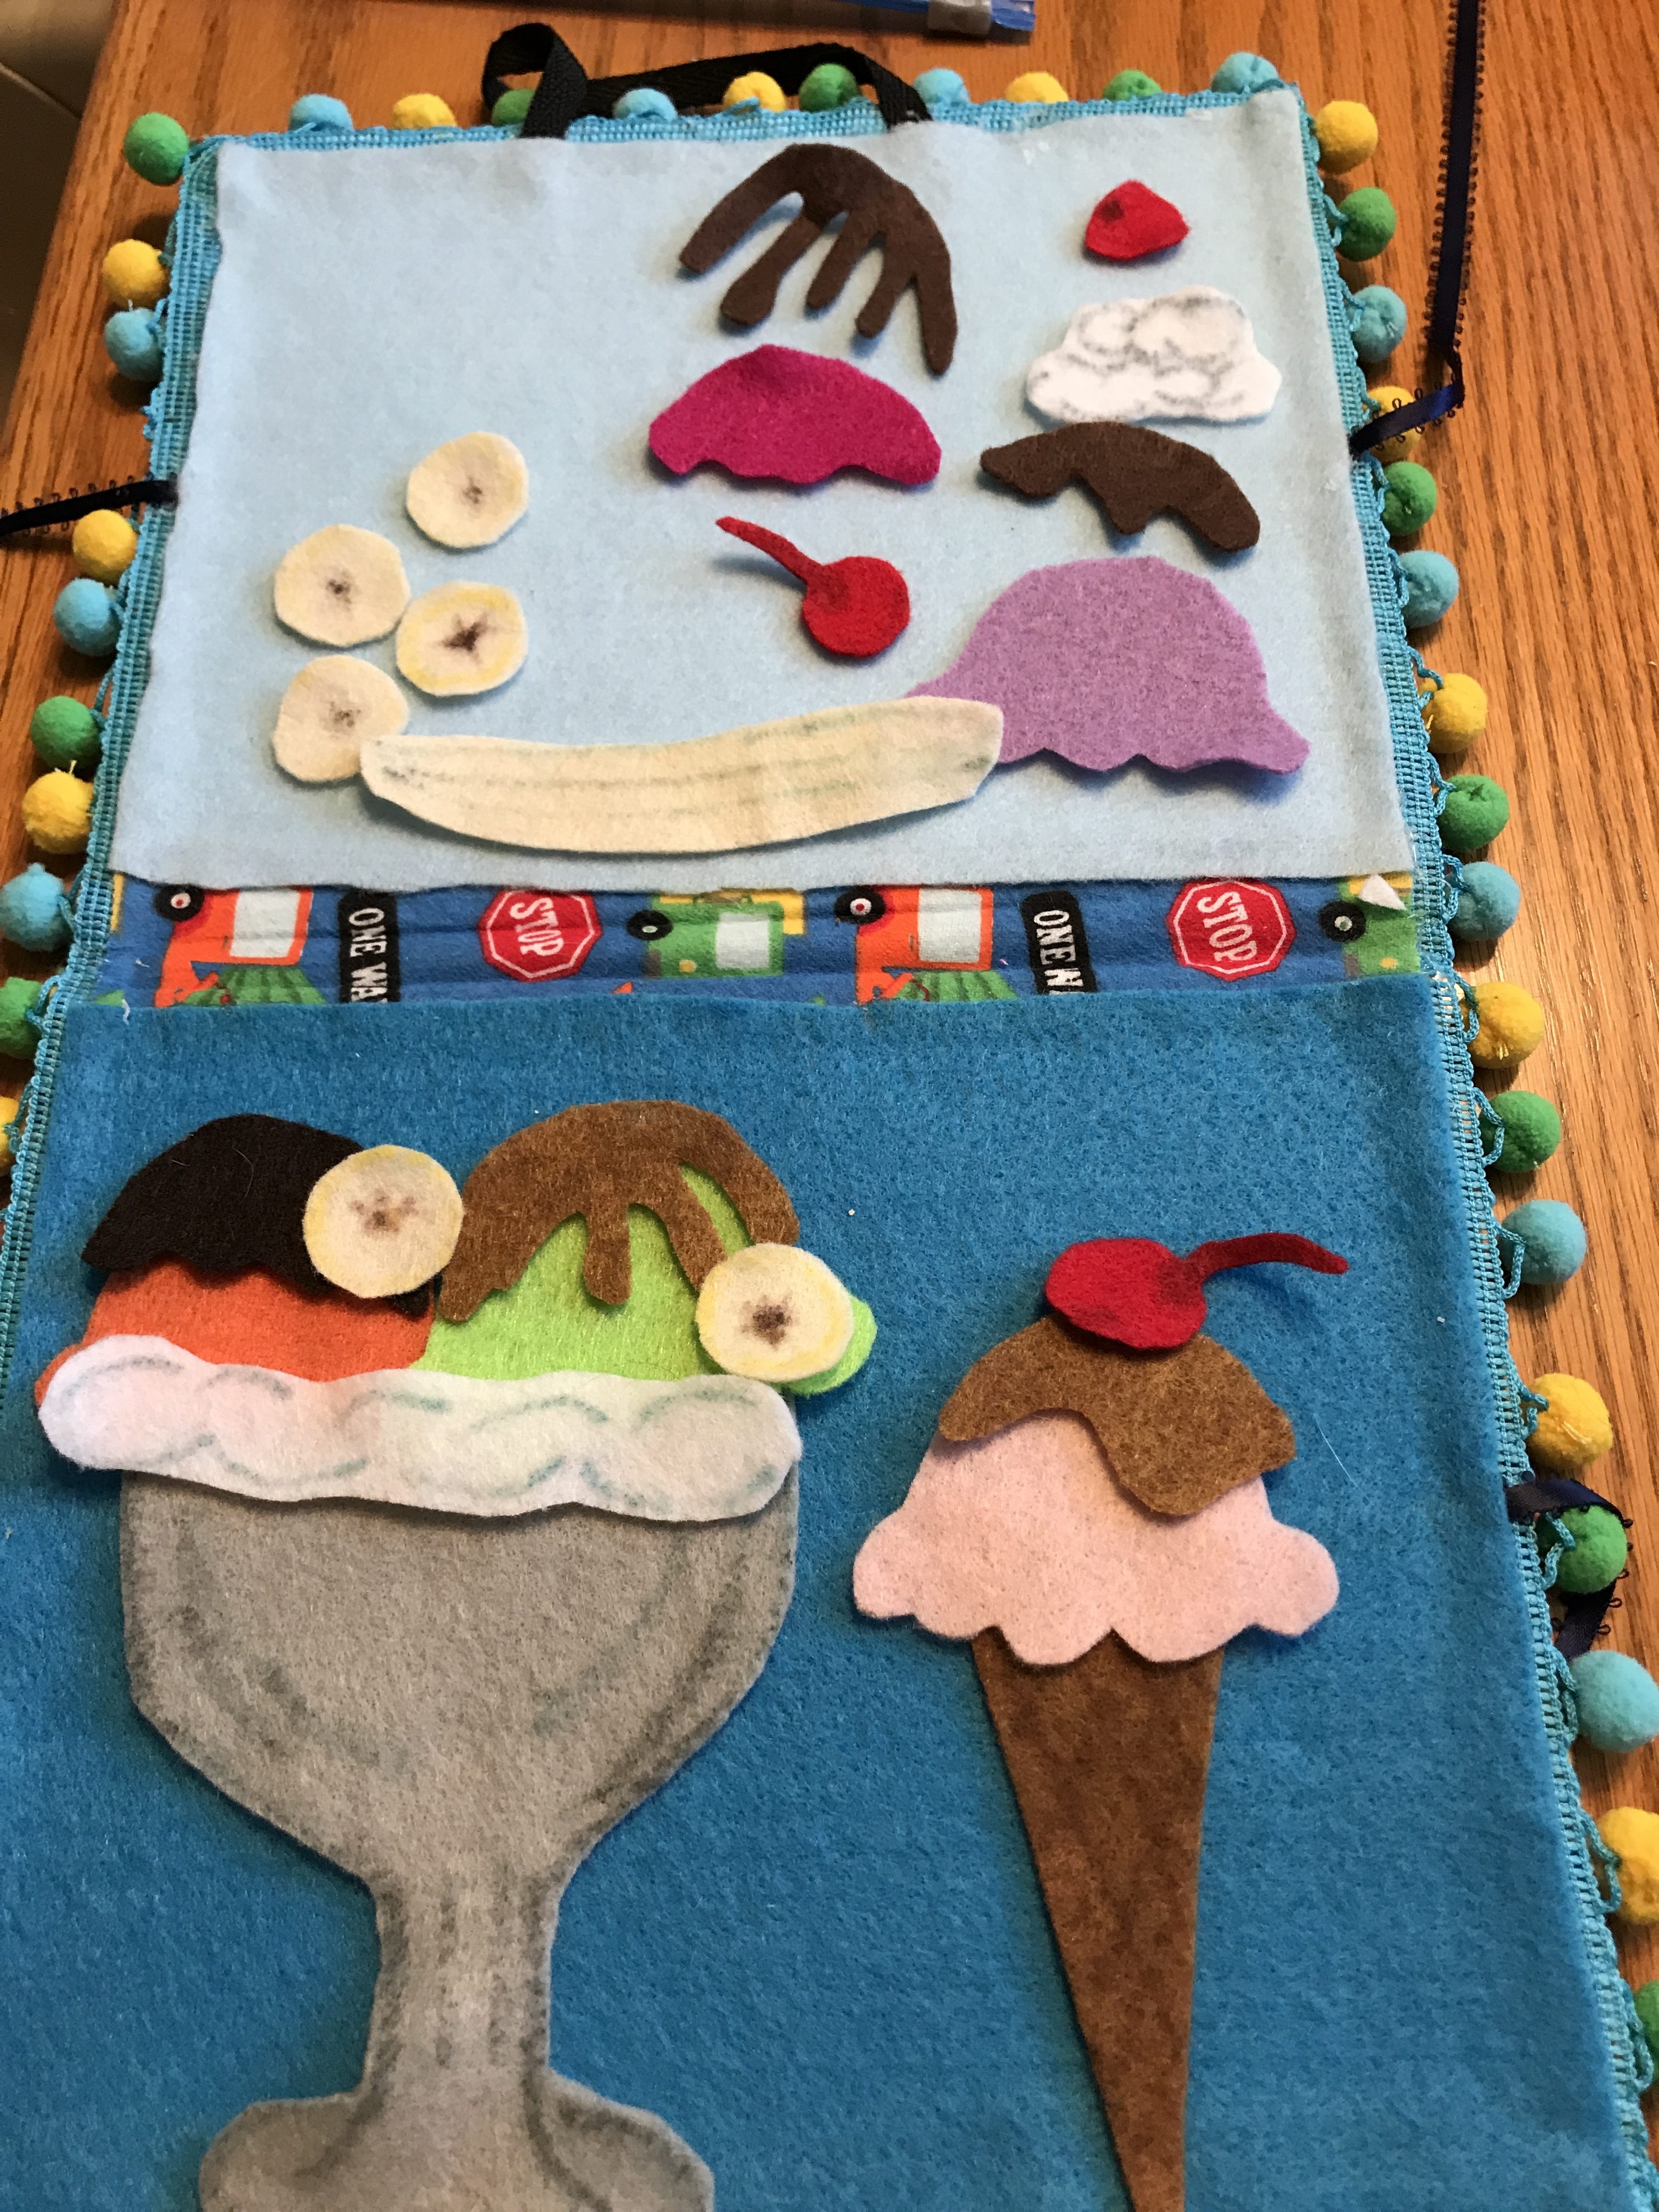
First pick out some fun attractive felt colors that match your favorite flavors. Then get several different shades of brown to use for the cones, fudge, chocolate syrup, butterscotch and chocolate chips. I also chose a gray for the ice cream dishes and white for whipped cream, but you can choose any colors you want.
I made these without a pattern by cutting a rounded top and improvising the bottom of the scoop with small scallop type semi circles. After making one, I placed the felt over other pieces and cut around it so that I had a consistent shape in different colors. For the toppings I used the same arch on the top and improvised the rest to make it look like different kinds of toppings.
 To make the dishes I drew my design on paper first, then cut it, placed it on top of the felt and used it as a guide when I cut new pieces. Make sure the dish opening is as wide as how many scoops you want to put in it. For example my banana split dish is three scoops wide, but the taller goblet is two scoops wide. Using the same principles make an isosceles triangles for the cones out of brown felt.
I think what makes this fun is the details. I made cherry garcia, mint chip, world class chocolate, rocky road etc by hot gluing small pieces of felt. Choose colors to give the impression of chocolate chips, marshmallows, nuts, caramel swirls, and cherry chunks. Snipping small pieces of those colors I then carefully glued them in random order to give it that extra special customized look. I also used felt tip markers to add a little definition to the dishes, banana slices, whipped cream and cherries.
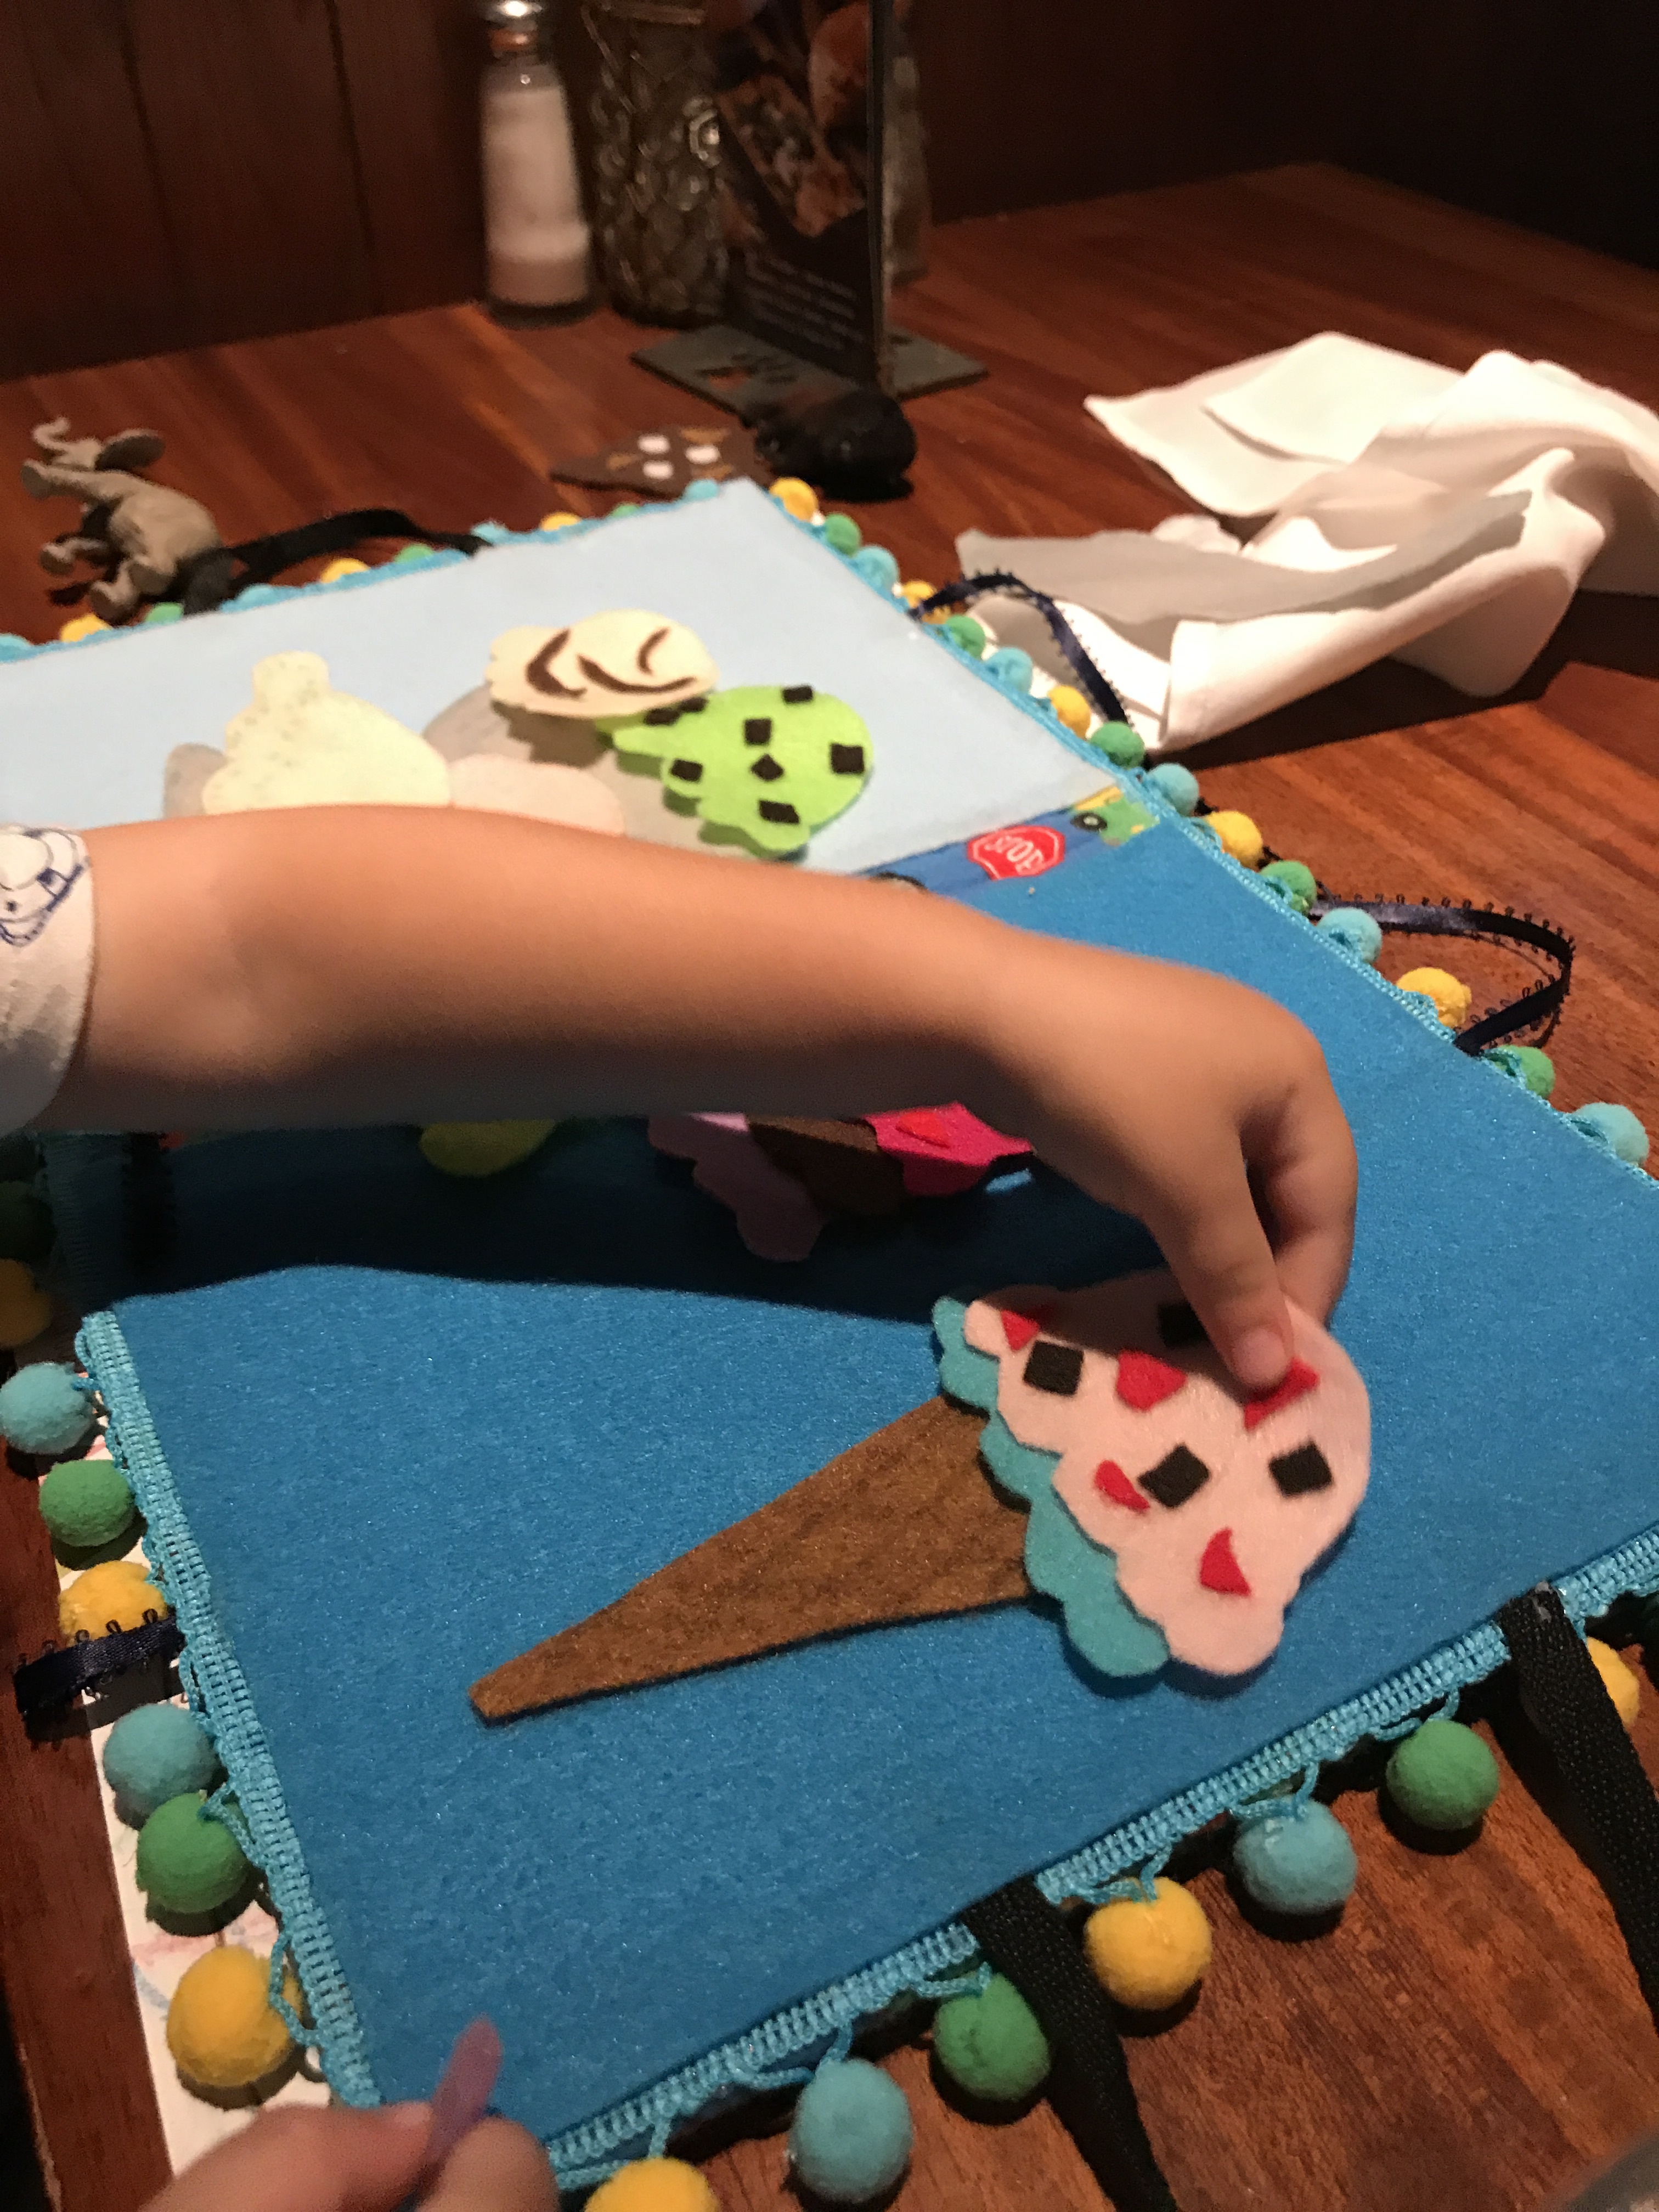
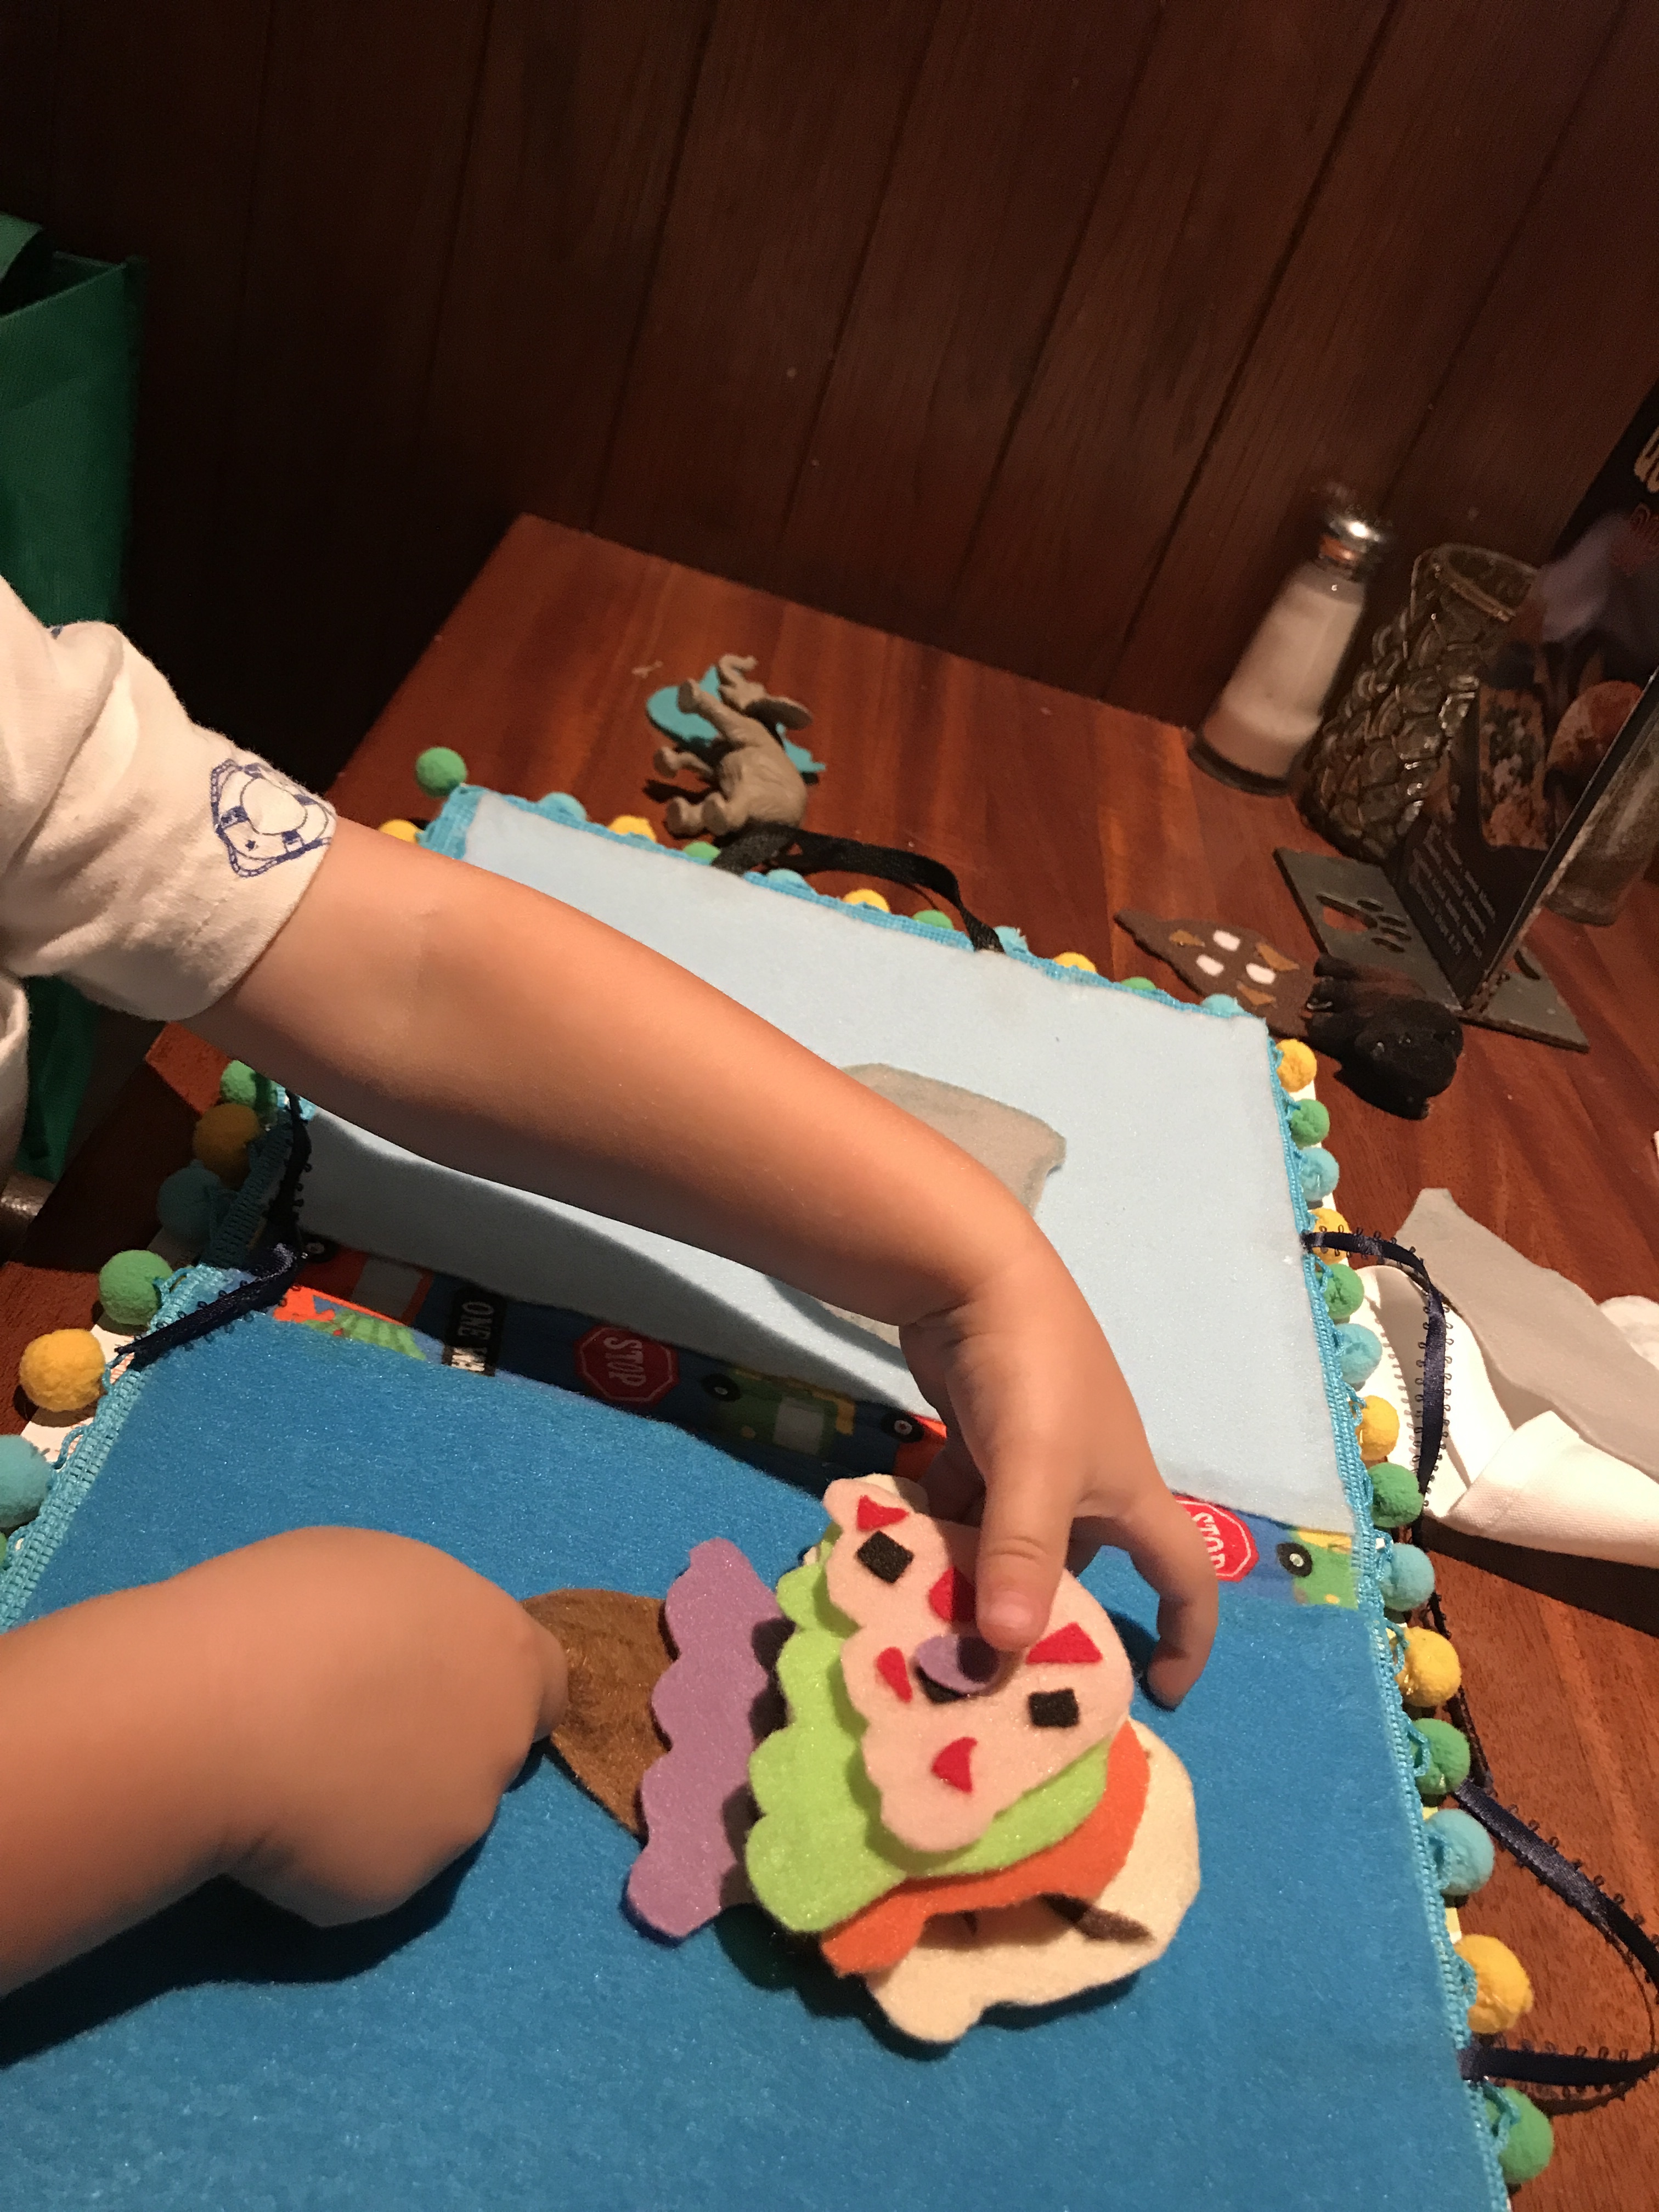 Did it work as I thought? Well, it kept my son entertained while we waited for our meal at a restaurant. He had no problem knowing what they were or how they go together and loves making ice creams for mommy and daddy. He sometimes stacks the flavors and I’ve seen some kids try to put them in their mouth… ha ha! So I guess they look as tasty as they are fun to play with. Playing make believe has never been so delicious!
The COTA perspective:
As a COTA sometimes finding just the right engaging activity is a challenge because not all children like all things. However, I’ve discovered that most children love ice cream. So when I need to work on fine motor, tactile, form constancy, ideation, problem solving, sequencing, visual perception, figure ground, or even eye hand coordination this has come in useful.
 In addition, if I want to increase the tactile component I can always add different types of textures fairly easily. I can glue pom poms, sequins, beads, sand paper, feathers or any other item I think would add a little more challenge.
For sequencing I ask them to complete things in order; pick out the right dish, choose your flavors, toppings and extras. Can they create a custom dish I request? Can they make me a banana split with mint chip, strawberry ice cream with chocolate syrup and a cherry on top?
If I want to add a more difficult problem solving task, I ask them to pick out the correct dish based on my order without having a visual aid. Can they choose the correct size? Do they pick up the felts in the right order? This activity can be easily upgraded in complexity for higher executive functioning skills but used for physical fine motor, visual scanning tasks as well.
I find the best activities are the ones that can be easily adjusted to challenge many levels of functioning and stimulate involvement. This has been great for me, not only can I use it for quiet time with my two year old, but for many therapeutic activities in clinic. I love that this can be used to address different types of goals easily without a lot of set up or clean up. Plus it is light and easy to carry!